About Me

My photo
I LOVE to design and to paint whimsical items that will put a smile on your face. Each day I share my simple life with you as I try to encourage, to inspire and sometimes JUST to make you smile as I recount my life growing up on a dairy farm! I've never had many material items in my life, BUT I have been blessed beyond words with love and encouragement from WONDERFUL Parents who instilled in me WHAT was important. I have had EVERYTHING that I needed and WAY too much of what I wanted. I am slowly learning to be a better person each day through my interactions with my friends on Facebook. Some day I hope to be as good as people seem to THINK I am! I am BLESSED! Welcome to my little corner of the world...Please stop by and visit often!

Friday, May 19, 2017

One Petal, 2 petals, 3 Petals, 4!

Why would I ever agree to try to duplicate something!

Good grief.

Once you do it, it is a one of a kind.

But my friend asked for tips, so tips I shall give. Well, I will share pictures. 

Nope, the second one was not like the first one and the third was like neither the first  nor the second.

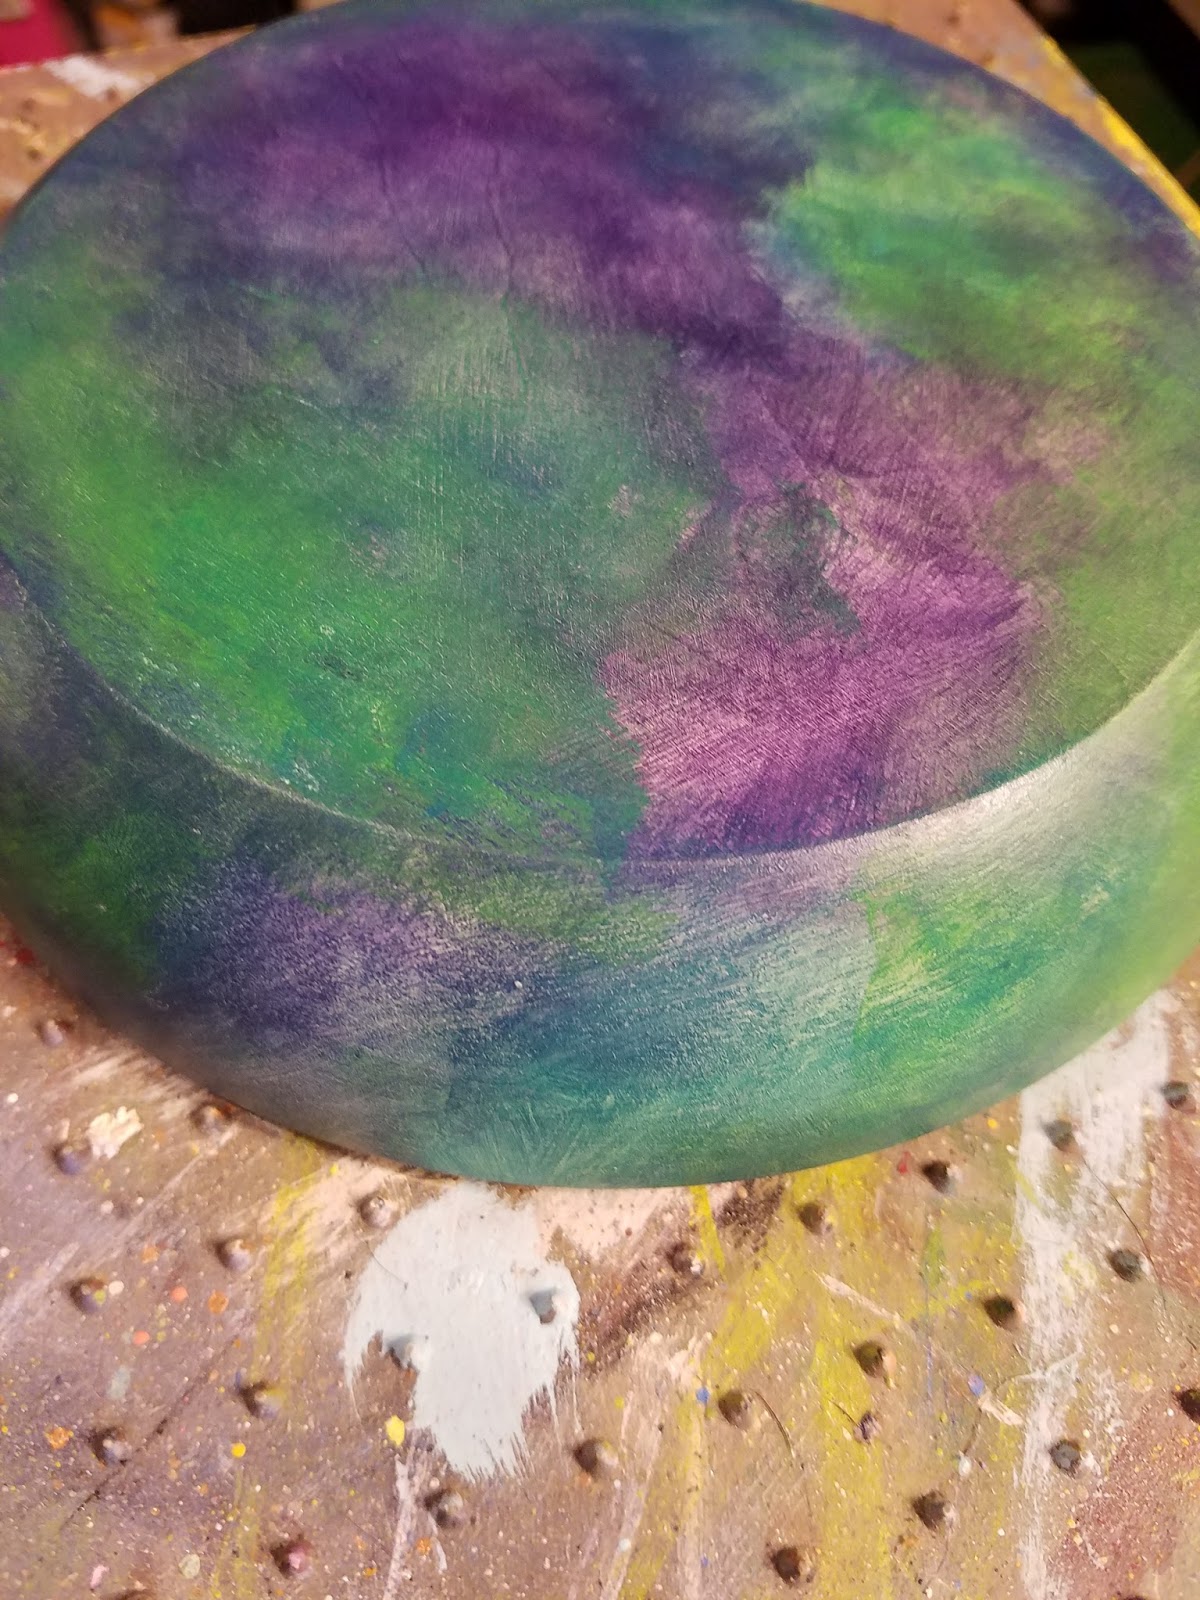
My background insisted on being darker and richer, so I just went with it!

The technique is the same, just don't add as much paint!

I have painted flowers for years,  but started enjoying the whimsicals more and more, so I had not painted a flower in several years.

I have a college friend that likes hydrangeas, so I planned to paint her this bowl before Christmas. Yes, I finally did last weekend, and she FINALLY got it as a RAK on Wednesday.

Yep, I am nothing if not the world's best procrastinator!  
Mother said that whatever you do, do the best you CAN!
I am an expert.  Of course, we all know that an expert is only a drip under pressure!  ;)

I learned to paint flowers mostly from Donna Dewberry books and books by Ross Stallcup. I changed them to suit my taste, as most painters should. I was AMAZED to find that some designers do NOT like people adding their own touches to designs.  I won't give my opinion on that, but you can probably tell! Lol

I feel kinda silly adding my tips for painting a hydrangea, since there are TONS of patterns out there. I recently bought a video from Maureen Baker, and discovered I had been doing it right, all along, not that I am certain there IS a right way.

There probably are lots of videos on YOUTUBE,  also.

But here I am...sharing that YOU can do this.

I will put a "pattern" in my etsy shop, so click on this link to go  To my etsy shop.  The price is $5 for those who wish to have this in pattern form.

Hey, visit my shop and see what I do.  ;)

I use filberts to paint most all of my flowers.  Use the appropriate size for the surface you are painting

The background was created using DecoArt Media Fluid Acrylics: Cobalt Turquoise Hue, Dioxazine Purple, Yellow Green Light.

I flecked it with my choice of  Dazzling Metallics.

You may chose any color to paint your flowers.  Choose a dark (pretty dark), medium and a Light Color--most any of the whites would work.

Hydrangeas come in many different colors.

For the stems/leaves, use your favorite greens. Again, choose a Dark, medium and light green.

Here are the step by step pictures.

Enjoy and I hope you will give it a try!


sorry, this is out of order, but I didn't want to have to move it...


This was the original piece

These are the 2 that
I did trying to duplicate
the first one...heavy sigh...LOL


Here is the link to buy the pattern for the hydrangea

I hope you will try different things.
Learning is fun!
I am simply blessed to create ~ charlotte♡


Thursday, May 11, 2017

TP Roll FLOWERS


I accidentally watched a video a few weeks ago.
It just loaded after I finished watching something!
A lady was making flowers from Toilet Paper Rolls.
I was intrigued, but couldn't watch the video...
I just wanted her to STOP talking!!
I was able to get the gist of the technique and knew I wanted to try.

SO....I found a surface...
An old stool that was painted Yellow and needed some LOVE...


I gathered the colors I wanted to use.


I got 3 toilet paper rolls
I put green tape around them to make sure 
I got them the same length on all sides.
I cut one short...
...one medium length
...one longer.

As always, I have baby wipes on hand.
They are so useful in wiping stuff off your hands
AND wiping up mistakes--hmmmm...I Keep LOTS on hand...lol


I wrap my brush in plastic wrap between coats
I HOPE to make a project soon with this dirty brush
Stay tuned...
I used CHERISH to base the stool.
I LOVE this yummy color.


It seems that BRIGHT COLORS 
are being used for 
all of my projects, these days!
I LOVE the Bright Purple!


I used 3 colors for the flowers:
Treasure, New Life, Revive
I started with the longest cut Roll.
Isn't that COOL!!


I put the paint on a paper plate--not a lot of paint
Placed the roll into the paint and gently twirled it around to load.
I gently place the loaded roll onto the surface.
I pressed the "petal" down with my fingers
Lifted it straight off.


I tried mixing up the placement of colors.
On this one, I put the shortest roll down first
Then the longest one
Finished by the medium length.

I started by loading the longest roll with Treasure
The medium roll with New Life
The shortest roll with Revive.
By the end, I was mixing it up to give new colors 


It didn't bother me that is blobbed...
it was going to have at least 3 layers, anyway!
My short "petals" were cut thicker than the other 2 rolls.
Honestly, this was all trial and error.


I just kept "stamping" until there was 
no more room to place flowers.
I love to live dangerously without 
too much planning.
Happy accidents were happening.
You can tell that I started to mix my colors.


This gives you an idea of how I was stamping them.
I tried to not load too much paint on the rolls.


This is what it looked like when I finished 
I LOVE THIS!!


I then added Inheritance to the centers.
I liked how the wet paint added 
another color to the centers.
It took two coats.
I simply stippled the centers 
with a small stencil brush, 
trying to make the centers round.


Next, I outlined the centers with Carbon.
I added random lines around the flower petals
I really am liking seeing them come to life!


I added Carbon squigglies 
to fill in the space.
I also added a broken line 
of Carbon around the edges, too.

I turned the stool and chose the top to be the highlight 
and the bottom to be the shadow of each flower.
I stippled LACE at the top for my highlight on each flower,


I went back over this with the Inheritance 
to knock back the highlight 
that was too strong.


I used a large paintbrunsh handle to add Lace 
dots of various sizes to the top of each flower center .
I added dots to the bottom 
of each flower center with Rustic.
Dots of Lace were added 
around the surface with my finger.
It think that made it perfect!

Hint: When painting, 
it is a good idea to bring the colors 
of your design into the background.
That is the main reason that 
I added Carbon squiggles 
and the Lace fingerprints.


I really do like this!
It was so easy, too.

I finished this by applying 
a coat of clear Wax.


HOW FUN!!
I hope you will try this.
IF you want a smaller center, 
you can roll up pieces of Cardstock 
and make them any size!
The possibilities are endless.
The color combinations...oh, the possibilities!!


Make certain to allow your soul to CREATE!!
It will renew your life and your outlook...


I am simply blessed to create~charlotte♡

Wednesday, May 3, 2017

Getting old...

Getting old ain't for sissies. 


We have all heard this and have watched our parents and older friends sometimes struggling, all the time, thinking it will NEVER be us--nope, ne-va!

BUT, over the past few years, I find myself repeating: "Mirror, mirror, on the wall, I'm like my Mother afterall!"

Heavy sigh...


Ok, stop laughing! 

STOP IT NOW!

Oh, it has probably been true the whole time, but we refused to admit it.

As the body begins to fade, the moments become more Lucy-esque. 


We tell ourselves, "NO, I don't need to write that down" when the truth is, we probably won't be able to FIND the note, anyway.

My greatest lie to myself is, "I don't need to go get my glasses" as I go to the cupboard to prepare a can of Chicken Noodle soup to warm me, while the young one pants from heat (yes--story of my life with Charcoal).


So, I fumble and find that all too familiar can that has been a staple my entire life.

I go to the stove to prepare it...NOBODY has to read the instructions, for we all know that you add one can of water to the soup. I certainly did NOT need my glasses for THAT!


BUT, as I was pouring it out of the can, I noticed the noodles looked weird, and, my goodness, for a soup that has quadrupled in price, they sure have gotten cheap and stopped putting in enough noodles! WOW! 

To the microwave, I went...Pushed the 2 (whew...I am glad it automatically starts, or I might really have to go the extra steps to get those glasses!)...

Ah, the sweet music of the ding! 

I go to the stove, pull up the stool and take that first anticipated spoonful of yummy....


Aaaaahhhhhhhyuuuuuuuucck! 

That is the nastiest thing EVER!!

I Grab the can and look....

Yep...chicken Noodle soup....

Buuuuut...wait, it says something else!


So, I quickly go to retrieve the glasses, only to read, LOW SODIUM READY TO EAT.

Oh, no, excuse me--this stuff is NEVER going to be ready to eat...ick...ick...ick...ick!!

I wondered what would happen if I put SALT in it...I didn't think that would help...whew...nasty! 

I picked up the can to see if I could read what went so wrong ...

I wondered HOW it got in the cabinet, when I remembered having fun at the grocery store, and, yes, I picked up the can WITHOUT my glasses...sigh

As I read the can, the words, "ready to eat" came into sight, again.


I finally turned the can around to see the instructions, "Do not add water."

What the...

There was going to be no way to make this right, so Charcoal got a treat, and, luckily, I had another can of the GOOD stuff! 

So, as the body creeks and cracks and I groan, I smile at my silliness and give THANKS to God for the gift of laughter.


The seasons march onward, and my body begins to crave "summer food" and I giggle like a child, only appropriate as I must be getting closer to my second childhood, although, I am not certain I really ever left the first childhood. 


I LOVE that the Vidalia onions are in the stores, and the tomatoes are tasting like REAL tomatoes, so I grab a can of Garbanzo beans, drain them, and chop the onions, tomatoes and parsley together for one of my favorite treats (sometimes I add ham)...

Aaaaahhhhhhhhhh...

Life is GREAT! 


I offer PRAISE for being fearfully and wonderfully made and that I was so blessed to have had such a great life growing up on the farm.


Make some memories with your family and friends, because, some day, that might be all that is left.


I am simply blessed to create ~charlotte ♡