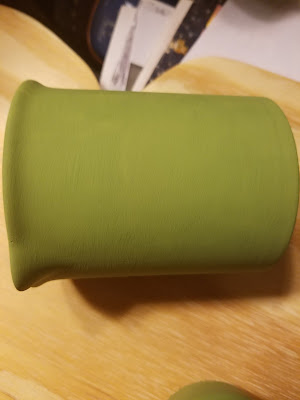
I had decided that I was going to use Chalky Finish Paint to paint the scarecrows I was making, so I quickly cleaned the little creamer and also grabbed a baby food jar, that--surprise, surprise--was also sitting on my painting table! LOL
I thought this would be a good test to show you WHY I love DecoArt Chalky Finish paints.
 |
| New Life is one of my favorite colors. |
These are the colors that I used to paint my little projects.
All I did was clean the items.
This is the first coat--don't lose hope--it will be ok.
Be sure to allow the paint to dry completely
before adding another coat.
*IF your chalky finish has become too thick, simply add water. I dip my brush in water and that usually makes it flow off my brush.
*No, you simply start painting--you don't have to prep the surface, except for making certain it is free from dirt/oils.
I think I added 3, maybe 4 coats of paint to the project.
It dries so quickly, that it is easy to lose count.
This shows the first coat to the top of the baby food jar--
no problem painting on metal, either!
This shows the second coat applied--pretty amazing, huh!
See how smooth this is!
Yes, sometimes the brush strokes show when painting,
but you can prevent this by thinning the paint more...
Personally, I like just a bit of the texture it creates.
I decided after I got the baby food jar painted,
that I wanted to make an ornament.
I drilled a hole in the top.
I Gathered a piece of ripped homespun material for a hanger.
I found a stylus to use to push the material through the hole.
I used needle nose pliers to pull the material through
and tied a note in it.
I free-handed the message with a White Charcoal pencil and painted over it with Titanium White Americana Acrylics.
When the paint dries thoroughly, I take a clean flat brush, and wet the surface and it removes the White Charcoal pencil...
just carefully wipe it dry.
*Yes, of course you can use DecoArt Americana Acrylics
on top of The Chalky Finish Paint!
DecoArt Chalky Finish Paint is one of my favorite ways
to create a background!
I drew a branch and added some pine needles and berries.
I flecked Titanium White onto the entire surface,
placed the top back on and WOW!!
Isn't it adorable??!!
I flecked Titanium White onto the entire surface,
placed the top back on and WOW!!
Isn't it adorable??!!
I found a saying that I liked and wrote it across the top of the creamer...
Added flowers...
Sealed it with DuraClear Soft Touch Varnish.
Of course, I wouldn't leave you hanging without
giving you a little pattern. LOL
I do, however, wonder if anybody has ever used
one that I have given to you! =)
Oh, well, we will pretend that they make you
happy to get them, and leave it at that!!
I wish you a wonderful week and
I hope you get to create SOMETHING.
I am simply blessed to create~~charlotte♡


Oh SO pretty !! especially the pine garland :)
ReplyDelete